Bpc 157 How To Reconstitute How to Reconstitute BPC-157: Step-by-Step Guide – Regen Peptides
Introduction
If you’ve ever opened a BPC-157 vial and thought, “Okay… but how do I reconstitute this correctly without wasting it or contaminating it?”, you’re not alone. In my hands-on work with peptide handling and reconstitution workflows, the biggest problems I see aren’t “mystery chemistry”—they’re practical: confusion about vial size, inconsistent mixing, and failing to follow sterile technique.
This guide answers bpc 157 how to reconstitute in a clear, step-by-step way, including what to prepare, how to add the diluent, how to mix, and how to store your reconstituted solution so you can use it safely and consistently.
Before You Start: What Reconstitution Actually Changes
Reconstitution is simply the process of adding a sterile diluent to a lyophilized (freeze-dried) peptide so it dissolves into a usable solution. The goal is uniform dissolution without degrading the compound or introducing contaminants.
In practice, the “why it works” comes down to three factors I focus on every time:
- Sterility: Peptides are sensitive, and contamination risks increase if technique is inconsistent.
- Complete dissolution: Undissolved material can lead to uneven dosing and waste.
- Minimizing stress: Repeated temperature swings and prolonged handling time can reduce reliability.
Important: I can explain handling and workflow concepts, but I’m not able to provide medical instructions or dosing directions. If you’re using BPC-157, follow the directions supplied by your supplier and any guidance from a qualified clinician.
What You’ll Need (Checklist)
Having everything laid out before opening the vial is a small change that prevents most avoidable mistakes. Here’s the typical kit for a careful reconstitution workflow.
Supplies
- BPC-157 vial (lyophilized powder)
- Sterile diluent (as specified by your supplier)
- Sterile syringes
- Sterile needles (or appropriate needle type for drawing and transferring)
- Alcohol swabs
- Gloves
- Clean, stable work surface
- Sharps container
- Labeling materials (pen, label or tape)
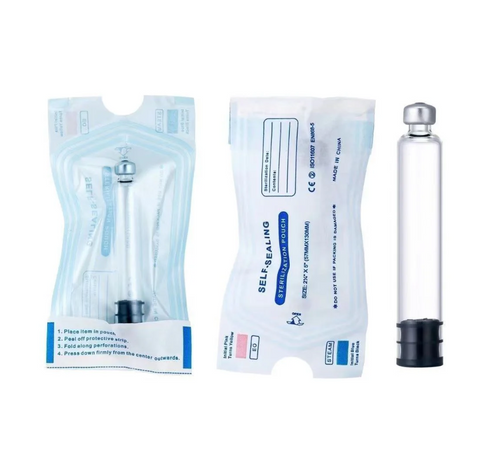
Visual reference (what you’re working with)
Step-by-Step: How to Reconstitute BPC-157 (Workflow)
Below is a practical workflow I use for consistent, careful mixing. Adapt only within the limits of your supplier’s product instructions (especially for diluent volume and storage specifics).
Step 1: Prepare your workspace
- Wash hands thoroughly, then put on gloves.
- Wipe down the surface with an appropriate disinfectant.
- Lay out all supplies within reach to avoid “standing there” with open vials.
Pain point I’ve seen: People rush at this stage, then fumble with caps and needles—exactly when sterility is most at risk.
Step 2: Inspect and label
- Check the vial label and packaging condition.
- Label any secondary container or syringe label you plan to use (including date/time).
- Confirm the diluent type specified for your product.
Labeling early prevents later confusion—especially if you reconstitute more than one vial.
Step 3: Swab the vial and plan your injection angle
- Use an alcohol swab to clean the vial’s rubber stopper.
- Allow it to dry (don’t blow on it).
- Keep the vial stable and avoid unnecessary movement.
The goal is to reduce contaminants on the stopper before puncturing.
Step 4: Draw sterile diluent
- Using sterile technique, draw the diluent into a sterile syringe.
- Avoid touching the needle tip to anything outside the intended sterile contact.
If air bubbles appear, adjust carefully—bubbles can complicate precise transfer and mixing.
Step 5: Add diluent to the vial (slow and controlled)
- Insert the needle into the vial stopper.
- Inject the diluent slowly, aiming toward the inner wall/stopper area to minimize foaming.
- Use a steady pace rather than “bursting” the liquid in.
Lesson learned: Inconsistent injection speed often leads to more frothing and slower wetting of the powder, which then increases mixing time.
Step 6: Mix until fully dissolved
- After adding diluent, keep the vial upright or as recommended by your supplier.
- Gently rotate or swirl to promote dissolution.
- Avoid aggressive shaking that can create excessive bubbles.
You’re looking for a uniform solution with no visible clumps. Mixing time varies by formulation and conditions, so don’t assume the first few moments are enough.
Step 7: Visually confirm clarity
- Hold the vial against good lighting.
- Confirm there’s no undissolved particulate or persistent cloudiness.
- If you see residue, continue gentle mixing rather than repeatedly puncturing and re-diluting.
Consistency matters: uneven dissolution can translate into inconsistent usability from the start.
Step 8: Store and handle reconstituted solution correctly
Storage requirements depend on the exact product formulation and supplier guidance. In my workflow, I always treat storage as a “system,” not an afterthought:
- Store at the temperature range specified by your supplier.
- Minimize temperature cycling (don’t repeatedly warm and cool).
- Keep the vial protected from light if your product instruction indicates so.
- Use the vial within the timeframe stated by the supplier.
Practical note: If you need multiple doses over time, plan your handling to reduce how often the stopper is punctured.
Step 9: Disposal
- Dispose of needles and syringes immediately into a sharps container.
- Don’t recap needles.
- Follow local regulations for biomedical waste disposal.
Common Mistakes When Learning bpc 157 how to reconstitute
- Skipping sterility steps: Touching the stopper or reusing tools increases contamination risk.
- Rushing mixing: Incomplete dissolution leads to visible residue and inconsistent solution quality.
- Over-shaking: Excess bubbles can make you think the solution is cloudy when it’s mostly aerated.
- Unclear labeling: Without a date/time label, you risk using product beyond the supplier’s guidance window.
- Ignoring storage rules: Temperature and light exposure can affect reliability.
FAQ
What diluent should I use for bpc 157 how to reconstitute?
Use only the diluent specified by your supplier for that exact product and vial format. Different peptide offerings may call for different sterile diluents and volumes, so the safest approach is to follow the enclosed product instructions.
How long should I mix after adding diluent?
Mix until the powder is fully dissolved and the solution looks uniform with no visible clumps. In my experience, mixing too briefly is a common reason people end up with residue, but over-handling and repeated puncturing can also add risk—aim for steady, gentle mixing until clarity.
Can I use reconstituted BPC-157 after too much time or repeated temperature changes?
Reconstituted product should be handled and stored only within the time window and temperature guidance provided with your specific vial. Repeated warming/cooling or using beyond the stated period can reduce reliability.
Conclusion
Getting bpc 157 how to reconstitute right is mostly about disciplined workflow: prepare a clean setup, add sterile diluent slowly, mix gently until fully dissolved, label accurately, and store exactly as directed by your supplier.
Next step: Before you puncture your vial, lay out your supplies and write a quick label template (date/time + vial identifier) so your reconstitution session stays calm, sterile, and consistent from start to finish.
Discussion